Showing posts with label craft projects. Show all posts

Christmas Around the World: Brazil


I'm so glad you're joining us as we start our journey, celebrating Christmas Around the World! If you missed Living Life Intentionally's introduction post, you can pop on over now (she's got some spectacular printables to go alongside our series!). 

I'm delighted to begin the series with Brazil. We chose Brazil because it's always intrigued me and honestly, because Brazil loves soccer. We've never been to Brazil, but the Farmer does have a Brazil beanie from a player who visited Brazil and brought him a souvenir. 

When I started this journey, I couldn't find much about Christmas in Brazil so I dug deeper and deeper until I found some pretty awesome stuff that I'm delighted to share with you! 

Traditions

Each year Rio de Janeiro celebrates the lighting of the Lagoa Christmas tree, a floating Christmas tree that stands 279 ft tall. The celebration includes fireworks, ballet performances and a symphonic orchestra (this may vary from year to year). Sweet P and I found a few videos online and watched the lighting of this amazing Christmas tree!

How awesome would that be LIVE?!

Recipe

When I first started looking for recipes, I thought I'd make a Brazilian meal, but then I found these Brazilian cookies and was sold. 

I had everything I needed in the house and we set to work on Saturday morning. I'll just fill you in on what occurred. While watching the first batch spin in the mixer, I saw something black. I stopped the mixer, scooped it out and scrutinized it. Yep. A black beetle. Tiny. Disgusting. Totally in the corn starch. 


So I dumped out the first batch into the garbage and started over with a fresh box of corn starch (luckily I had that too). By that time Sweet P lost interest and went off to play as I finished the dough. It sat for the required 20 minutes and then I rolled the cookies into balls, giving Sweet P the job of flattening them with a fork (an unnecessary step if you ask me). 

I really wanted to love these cookies. But. I didn't. Sweet P did (because that kid loves anything with sugar), but I was not impressed. Maybe it's because corn starch reminds me of Goop and nails on a chalk board, I don't know. I do love that they are gluten-free and Brazilian, but they didn't win me over. 

{What you need}
2 cups corn starch
1 cup sugar
3/4 c butter (at room temp)
1 tsp vanilla (the recipe called for real vanilla, but I only had imitation)
1 egg

Preheat oven to 375 degrees. Combine all ingredients on low in a mixer. Scrape down sides with a spatula until all is combined. Set aside for 15 to 20 minutes. Roll into balls and place on greased cookie sheet. Bake 7-10 mins until edges are a bit browned (not much!). 

*Cookies will be EXTREMELY crumbly while hot, wait until they've cooled to remove them from the cookie sheet. Store in an airtight container. 

Brazilian Flag Ornament

When I was looking through Brazilian Christmas ideas, I came across several ornaments with the Brazilian flag and thought that would be a great learning tool for Sweet P. 

I cut out the pieces for her and showed her a picture of the flag online. She assembled the ornament and stuck on the star pieces (rhinestones) while we talked about what ORDEM E PROGRESSO meant. She kept saying "Order and Progress, Order and Progress!"

{What you need}
blue, yellow and green cardstock
stickable rhinestones, a white crayon, silver star stickers, etc.
embroidery floss or string for hanging

Cut out the shapes of the Brazilian flag in the appropriate colors, with the exception of green. Cut a large circle for the green. Assemble flag on green circle. Write ORDEM E PROGRESSO with a black sharpie on the white portion of the flag. Stick on rhinestones, stars or color with a white crayon where the stars should be. 

Punch a hole in the top of the circle, thread string or floss and hang! 

Each star represents a certain state, but our ornament has a few less due to the size of the rhinestones. 

Nativity

A common tradition in Brazil during Christmas involves creating or setting up a Nativity scene. A variety of Nativity sets and scenes can be found throughout Rio de Janeiro during the month of December. Many are made from recycled materials, including this one made from the bottom of plastic pop bottles! 
Picture 19

In Brazil, the Nativity is also called Presepio, from the word "presepium," which refers to the bed of straw Jesus slept on when He was born. I loved the idea of creating a bed of straw, so I set up an invitation to play for Sweet P with a manger, yarn straw and glue for her to find when she woke up in the morning. 


I also had pieces of a Nativity set out for her (they were stickers she put on paper last year and I just cut around them so they were flat playing pieces) and made a tiny baby Jesus out of a wooden bead, some pompoms and scrap fabric. While she was playing with and arranging the Nativity pieces she asked, "Where's Jesus?" I pointed to the baby and said, "He's right here. This is when He was a baby." And in true 3 year old fashion she asked, "Why?"

As she made the manger, we talked about what "presepium" means and when I asked her later she said, "A bed made of yarn." Which in her manger's case was correct! 

How amazing is it that our Savior, our KING, slept on a bed of straw? This was by far MY favorite part of our Brazilian Christmas study: making the manger and talking about our King.

I wasn't sure Sweet P understood what we were doing, then on Saturday night (movie night), she told me "I'm going downstairs to see if we have a Brazilian Christmas movie!" Ha. So something was working around in that sweet little head of hers!

I hope you enjoyed learning about Christmas in Brazil as much as we did! Be sure to check out tomorrow's post by Sun Scholars on Christmas in China! 

Simply Spray Project Paint Puppet Theater & Giveaway

A few weeks ago I was asked to review a pretty awesome product and I'm excited to share it with you today! Simply Spray Project Paint is a non-toxic, aerosol paint that is safe to use on all kinds of crafts projects, including kid projects! Although it's safe for kiddos, the company does recommend the product for kids 8 years old and up. 

I wasn't sure what we were going to make with our paint, but then I saw these AMAZING puppet theaters from Teach Preschool and my mind was set on making one for the kids. The Farmer had several display boards from student presentations so I grabbed one and got to work!


I received 3 bottles of Simply Spray paint in red, blue and purple. Although the paint is safe to use indoors, it does spray out and I recommend doing large projects outside. We took ours outside and started spray painting. In hindsight, I thought one bottle would go a bit farther so I ended up using all 3 bottles on the theater. It sprays out evenly and covered the cardboard really well. I left it outside for about an hour to fully dry. 

I had a bit of trouble with one of the bottles and although I followed the instructions for a stuck nozzle I wasn't able to make it start working again. I ended up putting the nozzle of one of the empty cans on the nozzle I was working with and got it started again.

The colors are super vibrant, which I love and while I love our puppet theater, I really wish I'd made a t-shirt, too! Simply Spray Project Paint is simple to use, safe for the environment and comes off easily from your hands with soap and water. 

Once it was finished I cut out the stage with a box cutter, used a glue gun for the curtain and rounded up our puppets. I also made a few new ones! 

Simply Spray Project Paint works on fabric, wood, cardboard, poster board and foam pieces. Sold exclusively at Wal-Mart, Simply Spray Project Paint comes in 8 colors: black, red, orange, yellow, green, blue, purple and white. 

Want to try it yourself? Enter to win 2 cans of Simply Spray Project Paint in the colors of your choice! Giveaway is open to US residents ages 18+. Winner chosen August 20th.  

Mandatory Entry: Visit Simply Spray, then leave a comment telling me what YOU would make with Simply Spray Project Paint!

Additional Entries: You are eligible for additional entries once you've completed the mandatory entry (please do this as your first comment). Please come back to leave a comment for each additional entry. The winner will be chosen from blog comments.
  • Visit The Iowa Farmer's Wife Facebook page and comment on a post (1 entry)
  • Visit Simply Spray on Facebook (1 entry)
  • Follow Simply Spray on Twitter
  • Follow The Iowa Farmer's Wife on Twitter AND tweet this giveaway. Please use @TheIowaFarmWife when tweeting (1 entry)
  • Add The Iowa Farmer's Wife on Google+ (1 entry)
  • Follow The Iowa Farmer's Wife via Google Friend Connect on the sidebar (1 entry)
  • Subscribe to the The Iowa Farmer's Wife via email (1 entry)
FTC Disclosure: I received this product free of charge from Simply Spray in order to conduct an honest review. I was not compensated in any other manner to review this product. Photos and images in this post are owned by me or provided by Simply Spray.

Recycled Medals


Last Saturday we created an Olympic Obstacle course (more on that coming soon) for Sweet P complete with an Olympic torch, medals and rings. We made our medals on Saturday morning while the Farmer was at class, and I was having a hard time coming up with what to use.

My original idea was to just use paper and paint it Gold, Silver and Bronze, but while I was in the basement rummaging through the recycling products I keep for crafts, I found a gold lid from a jar of pickles. It was PERFECT for the gold medal. So I decided we'd use that for gold and paint the others. Then I picked up a plastic lid the same size as the gold lid and thought YES! we can cover this one with tin foil! There were two of those so I decided we'd use tin foil on one and paint bronze on a piece of paper for the bronze medal.

After Sweet P'd painted a bronze circle on a piece of paper and it was outside drying, she made the silver medal with tin foil. When I looked it I realized we could simply PAINT the tin foil with the bronze paint and it'd be perfect! I mixed up another batch of bronze paint and she painted the tin foil (not as easy as it looks!). She ended up having to do a bit of a sponge method to get the paint to stay without smearing.

The Craft: Recycled Medals

What you need:
1 Gold lid
2 plastic lids
tin foil
bronze paint (or a mixture of yellow and sparkly pink)
beads (color of your choice)
glue gun
  
Fold tin foil around the 2 plastic lids until fit to your liking. 

Set aside the Silver medal and paint the other with bronze paint. Set aside to dry. 

Hot glue beads to the inside groove of each lid. Wear with pride!


Check out our 3 Olympic Ring Ideas and stayed tuned for Kids Bloggers Go Olympics! The Blog Hop beings July 27th! We hope you'll join the fun! Visit these introduction posts by Rainy Day Mum and Angelique Felix for more information on how YOU can participate!
Celebrating the olympic Games

Like the Iowa Farmer's Wife on Facebook to receive updates and see other posts! You can also follow The Iowa Farmer's Wife on Twitter, Pinterest and Google+

3 Olympic Ring Activities

Are you getting ready for the Olympics?! We are so excited about the opening ceremony this week!

Last week Sweet P made 3 different sets of Olympic rings. I read an excerpt from an Olympics website about the significance of the rings and explained to Sweet P that they represent the five major regions that participate in the Olympics: the Americas, Africa, Asia, Europe and Oceania. The colors are not linked to a specific continent and are present on the Olympic flag, which made its debut at the 1920 games in Belgium.

 Sweet P made the first two sets with paint and recycled materials.


TP Rings:

  • Toilet paper tubes
  • Red, black, blue, yellow and green paint
  • Paint brush
  • Glue gun
Sweet P painted the outsides of the rings (in hindsight, we probably should've done the insides, too!) and I glued the rings together with a glue gun.


Egg carton Rings:
  • Empty egg carton
  • Red, black, blue, yellow and green paint
  • Paint brush
  • Scissors
  • Glue gun
I cut out the carton so that there were 3 in a row for the top row of rings and 2 in a row for the bottom row of rings. I showed Sweet P a picture of the rings and she painted them accordingly. I glued the two rows together when the paint dried. 

To hang TP Rings and Egg Carton Rings: Punch a hole in the top and string yarn through the hole. Hang to display. 

Sprout LOVES the Olympic Rings mobile we have hanging in our kitchen!


Do-A-Dot Rings:
  • Do-A-Dot markers (or any type of markers) in red, black, blue, yellow and green
  • Large piece of drawing paper
  • Pencil
  • Lid or circular object to trace
I traced the rings onto the paper in pencil and explained the activity to Sweet P. I again showed her the picture of the Olympic rings and she dotted the rings in the colored order. On some of them, she decided to trace the ring instead of dot along the line, which turned out pretty neat! I wasn't sure if she'd be able to tell the difference in the rings since they overlap, but she did it without a problem.

Are you ready for the Olympics? We are! In fact, we're pairing up with several other fabulous bloggers in a series called:
Celebrating the olympic Games
Visit these introduction posts by Rainy Day Mum and Angelique Felix for more information on how YOU can participate!

How are you celebrating the Olympics?

Like the Iowa Farmer's Wife on Facebook to receive updates and see other posts! You can also follow The Iowa Farmer's Wife on Twitter, Pinterest and Google+

The Sunday Showcase: Playing With Food


Welcome to another week of The Sunday Showcase! Thanks for visiting and linking up! This week I'm featuring posts related to food because playing with your food makes eating more fun! 

JDaniel4's Mom shared their fun 4th of July snack! How adorable is that little pin wheel?!


How cute are these hard boiled egg mice that Mama Miss shared?! She made breakfast, lunch and dinner mice for her little one, and she shared a cute little mouse maze printable!


Lovin' this Firework Bento that Biting the Hand that Feeds You made for her super star! Love the peas!

These book inspired lunches by Keitha's Chaos are sure to be a hit with any kiddo! I especially love the wolf she made! 

What we've been up to:
Check our our Box Monster we made last week! We had tons of fun!


Were you featured today? Don't forget to grab a button!


Now it's your turn to link-up! If this is your first time, please read this informational post for details.

This is a fun and relaxed linky with a few guidelines:
  • You can link as many kid friendly or child-centered posts as you'd like, however, links for giveaways, shops, or downloads for purchase, etc. will be deleted. 
  • Please try to visit a few other posts if you are linking up. Everyone loves comments, feed-back, pins and shares!
  • I'll share some posts via Facebook, Twitter and Google +, while commenting on and pinning others.
Please NOTE: By linking up you are giving us permission to use a photo (with proper link to you!) in our featured section! If you prefer not to be featured comment below or e-mail me.

Thanks for joining us and I look forward to seeing what you've been doing this week! Don't forget to visit my co-hosts for additional features this week!


Tie Dye with Hollyhocks & Beets

Last week Gammie and my cousin Blair (12 years old) visited and we set to crafting. Raise your hand if you agree that crafting is better with others?!

I've been wanting to try dying something with beet juice (and we've got a fair amount of beets this year) so we dug out a white t-shirt for Sweet P, a onesie for Sprout and two head bands (one for me and one for Blair). In the midst of planning, the Farmer mentioned using hollyhocks. I was skeptical, but gathered dry dark purple hollyhocks from the flower patch in the front of the house.

It took a bit longer than we thought because you need to prepare your items before you dye them. When using natural dyes it helps set the dye.

Here are the steps:
Place items in a large pot of 4 parts water, 1 part vinegar. Simmer for 1 hour. You can begin dying right away or allow items to dry a bit. We let ours dry quite a bit before putting the rubber bands on.

For Beets: Peel and chop beets. Place in a sauce pan with 4 cups of water and bring to a boil. Reduce heat and simmer until beets are soft. Turn off heat. Strain beets and set juice aside for dying. Eat or compost boiled beets.

For Hollyhocks: Place 1 cup of dried flowers in a small pot with 1-2 cups of water. Bring to a boil. Reduce heat and simmer for 30 minutes. Turn off heat. Strain flowers and reserve juice.

Place rubber bands on the items in various places.
Dip sections in the dye or place the entire item in the dye.

Allow to dry before removing rubber bands.

Remove rubber bands and admire your work!


NOTES:
The hollyhocks were AWESOME! They created a dark purple hue that I loved. We were really surprised by the golden beets and the color they created. The pink of the regular beets wasn't quite as dark as we were hoping for, but it still came out pretty neat.

I can't wait to do this again!

Sweet P wasn't awake when we did this project, but I definitely think it's something she'd love so we'll be doing it again so she can experience the dying process.

Stay in touch with the Iowa Farmer's Wife on Facebook, Twitter, Pinterest and Google+

25 {Free} Summer Activities


1. Tour a fire station. Call ahead to arrange a tour for you and your family or a group of friends. Tours generally include a tour of firefighter facilities, explanation of tools on the firetruck, test page (to hear what they hear when a call comes in) and photo ops! (Our friend Amy set this up for us and it was so neat!)

2. Go to story time at your local library. Some require registration, but ours is simply a drop-in story time welcome to the entire community. Activities usually include a few books, songs, bean bags and bubbles!

3. Run in the sprinkler. Need to water the grass? Run through it while you do! Moms: don't forget to join the fun!

4. Visit Bass Pro Shop for free summer activities, such as fishing, archery, wildlife exploration and bird watching workshops. They also offer free crafts!

5. Make popsicles. Our homemade ones taste 100% better than store bought. If you don't have popsicle molds, make them in an ice cube tray with a toothpick as the stick.

6. Play with chalk. The possibilities are ENDLESS! Make a giant board game, town, road, hopscotch, counting game or simply draw.

7. Go to a Farmer's Market. Check out your local farmer's market or visit one while traveling. The Des Moines Downtown Farmer's Market has free live music and kids' activities as well.

8. Host a messy playdate! Most of the items can be made with stuff you already have in your pantry!

9. Create a bubble bucket. Fill a bucket or tub with water and bubbles, add a few utensils or toys and watch the fun! (pic at the top).

10. Mini Olympics! Swim, run, bike, do gymnastics, or play soccer, basketball or volleyball as a family. Do one activity per day or lump several in one day for your own mini Olympics. Make homemade ribbons for the winner in each category.

11. Go the Des Moines Art Festival (or find a local one!). The Des Moines Art Fest has free kids' activities, live music and tons of great art!

12. Explore ice. Use paint or food coloring for colored ice for a fun time in the baby pool. Or freeze plastic toys in ice and explore all the different ways to free the toy from the ice (melting, hammering, salt).

13. Watch a parade. Find out if your area (or one nearby) has a July 4th parade and head over for an hour of fun watching floats and marching bands.

14. Explore a new playground or nature reserve. It's even better if it's near a lake or body of water! Big Creek State Park in Polk City is our new favorite!

15. Collect trash. Head to a park or do it in your own neighborhood. Wear gloves and bring a garbage bag to collect any garbage or debris you see in nature.

16. Have a game night OUTSIDE! Bring your board games outdoors for a new twist on an old favorite.

17. Go on a scavenger hunt: I especially love this chalk scavenger hunt from NurtureStore!

18. Bake. Try a new cookie recipe or simply make a favorite. Eat the cookies outside on a blanket.

19. Make a bird feeder, then watch the birds.

20. Listen to a free outdoor concert. Check your local area for free concerts. Yankee Doodle Pops is a local favorite with fireworks at the end!

21. Make mud pies!
22. Sign up for your libary's Summer Reading Challenge to inspire your children to read more both alone and with you. Many have fun prizes after a certain number of hours spent reading.

23. DIY playdough! Involve your kids in the making of the playdough (supervised of course!). Try stove top and no-cook versions!

24. Play at a splash park! There are several in Des Moines that are free to the public. Try Ashby wading pool (free all the time) and the Ankeny splash park (free from 10-12pm on weekdays).

25. Create a special outdoor place to read. Find a nice piece of shade and take out blankets, pillows and piles of books. A tent would be great too! Read with and to your kids while breathing in the outdoors! (Don't have a backyard? Take blankets to a park!)

For summer fun ideas check out our 2012 Summer Bucket List and our Summer Fun board on Pinterest!

{Weekly Kid's Co-op #7} Linky & Features

Welcome back to another week of the Weekly Kid's Co-op! Last week was CRAZY for this little family so I didn't post, so this week we'll have 5 features instead of 3!
The Weekly Kid's Co-op
It was a great week of posts! If you missed it, check out last week's Co-op here! So without further ado here are this week's features:

Love this sea life playmat from Making Boys Men! There are SO many different ways to use it and so many other scenes you could create!

Doesn't this Color Mixing and Oobleck activity from Train Up a Child look like tons of fun! We just played with oobleck for the first time last week and I love the color mixing aspect of this post!


How fun is this recycled calendar matching game from Pre-school Play?! What a great way to show real life animals in their habitats! 


Ok, how cool is this?! It's a seed matching game from Stories and Children! Such a fun way to teach kiddos about what comes from these seeds and how they are different. We have SO many seeds and beans so we are definitely doing this!
Seed Matching Game

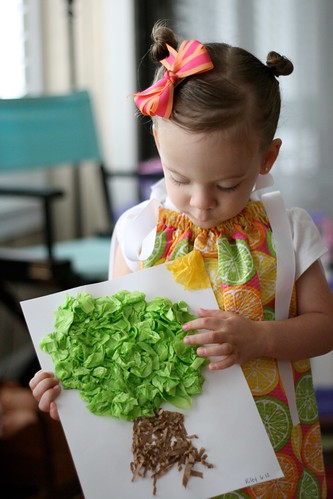
A Day in the Life of the Brown Family shared this adorable post about plants and the art they created! I love all their art projects, especially the tree! Plus, the photography is awesome!
IMG_2217

Were you featured today? Don't forget to grab a feature button!


TheIowaFarmersWife