Showing posts with label toddler projects. Show all posts

Winter Wonderland Blog Hop: 10 Winter-Themed Activities


I'm so excited to present the Winter Wonderland Blog Hop. For the next month (Jan. 13th-Feb. 13th), 35+ bloggers will be posting about a winter-themed activity, craft, recipe or printable. You can find a calendar list at the bottom of this post of the dates and bloggers who'll post on those dates. Each day I'll pop in to update the link to show the title of the blogger's winter-themed activity so check back often to beat the winter doldrums with super fun activities from some amazing bloggers! 

To kick-off the Blog Hop, I'm posting about 10 of our favorite winter activities! 

1. Build Your Own Snowman Muffin Tin Meal - Our favorite muffin tin meal of all time! 
2. Snow Glad We're Friends Cards - Send a card to a friend just for fun!
3. Winter-Themed Sensory Bin - Use rice as snow for a fun way to explore!
4. Coffee Filter Snowman - Perhaps the simplest snowman you'll ever make!
5. Bring Snow Inside! - If it's too cold (or dark) to play outside, bring the snow inside!
6. Simple Snow Play Dough - Try our simple snow play dough recipe!
7. Snow Tracks - Find and explore animal tracks in the snow!
8. Tot School: Snow Edition - Fun ways to learn with snow-themed activities!
9. Fingerprint Snowmen - Make a village of snowmen or turn them into a card!
10. Build a Snowman - Last, but certainly not least go the traditional route and build a snowman in the snow. Find fun items around the house for the face, arms and buttons, or use Mr. Potato Head pieces!

CALENDAR LIST OF POSTS:
January 13th: The Iowa Farmer's Wife - Introduction Post
January 14th: B-Inspired Mama - Snowflake Drop DIY Baby Toy
                    Kid World Citizen - Ice Sun Catchers
January 15th: Love Play Learn - Snowman Felt Story Board & Song
January 16th: KC Edventures - Fun with Kids Books and Winter Activities
                    Frogs and Snails and Puppy Dog Tails - Winter Bath for Kids
January 17th: Milk and Cuddles - How to Make Snow
January 18th: Putti's World - Craft Foam Snowman
January 19th: Nurture Store - Bake a Snowman - Cake Recipe for Kids
January 20th: Creative Playhouse - Homemade Cold Snow
January 21st: Mom to 2 Posh Lil Divas - Packing Peanut Snowflakes
January 22nd: Teach Preschool - Snowman in a Bag
                     This Reading Mama - Snowflake Window Wonderland
January 23rd: Housing A Forest - Creating Colorful Icicles
January 24th: Royal Baloo - How is Snow Formed?
                    Home Learning Journey - Potato Print Penguin
January 25th: Two Big Two Little - Comparing Different Types of Fake Snow
January 26th: Ready Set Read - Winter Word Work
January 27th: CraftoArt
January 28th: The Outlaw Mom Blog - Easy Sticker Snow Globe
January 29th: JDaniel4s Mom - Snowflake Mobile
January 30th: Creative Family Fun - Polar Bear Masks
January 31st: Kitchen Counter Chronicles - Snowy Day Felt Board
February 1st: Caution! Twins at Play
February 2nd: Enchanted Homeschooling Mom - Groundhog Day Round Up
February 3rd: Blog Me Mom - Cotton Rounds Snowman Craft
February 4th: Mama Miss - Snowflake Stained Glass Mobile
February 5th: Living Montessori Now - 25+ Snow-Themed Sensory Tubs
                    Ingles 360 - Playing with Ice
February 6th: Glittering Muffins - Peanut Snowman Magnets
February 7th: The Pleasantest Thing - Winter Song: Today is Monday
February 8th: Here Come the Girls - Create an Inside Winter Wonderland
February 9th: 3 Dinosaurs - Paper Roll Snowman
February 10th: Train Up a Child - Penguin Sensory Bin
February 11th: Little Artists - The New Year of China
February 12th: The Chirping Moms - Snow Inspired Crafts
February 13th: My Nearest and Dearest - Winter Picnic

What's your favorite Winter-themed post? Share your post with us in the comment section!

7 Day Nativity Activity For Kids

The Imagination Tree
<div align="center"><a href="http://www.theimaginationtree.com
" title="The Imagination Tree" target="_blank"><img src="http://rainydaymum.co.uk/wp-content/uploads/2012/12/focus-on-the-Nativity.jpg
" alt="The Imagination Tree" style="border:none;" /></a></div>

We do several different Advent calendar activities, but this year I wanted to do start a tradition of telling the Nativity story in parts over 7 days using our Melissa & Doug Nativity set. We received it last year as a Christmas gift so this is really the first time we've gotten to play with it since it got packed away in our Christmas decor soon after we arrived home from Christmas last year.

You can use any Nativity set for this activity, but Melissa & Doug's set is by far my favorite of the few that we have. I love the durability of the wooden pieces and the adoration on each of the figures' faces. My absolute FAVORITE part is that the manger is double-sided and you can save baby Jesus for Christmas day.

I broke the story down and created the following 7-day plan:

Set out the figures the night before (see below for ideas on how to use the printable) and allow your child(ren) to explore the pieces when they wake each morning. We have a breakfast picnic and read the scripture during this time, but setting up the Nativity scene on your kitchen or dining table works as well.

Day 1: The Annunciation
The Archangel Gabriel visits Mary
Luke 1:26-28

Nativity Figures Needed: Mary & the Angel
Discussion: What did the angel say to Mary when she was scared? What name did the angel say to give the baby?
Song to be Sung or Listened to: Hark the Herald Angels Sing

Day 2: The Dream
The Archangel Gabriel appears to Joseph in a dream
Matthew 1:18-25

Nativity Figures Needed: Joseph & the Angel
Discussion: Who is Joseph? Talk about Jesus' earthly father and heavenly Father.
Song to be Sung or Listened to: Joseph's Lullaby - Mercy Me

Day 3: The Visitation
Mary visits Elizabeth
Luke 1:29-56

Nativity Figures Needed: Mary & an additional woman/girl figurine
Discussion: What happened when Mary greeted Elizabeth? Talk about a baby's movements inside the womb.

Song to be Sung or Listened to: Believe - Josh Groban

Day 4: Census
Mary & Joseph travel to Bethlehem for Jesus' birth
Luke 2:1-7

Nativity Figures Needed: Joseph, Mary, Jesus & stable animals
Discussion: Talk about a census. Where did Mary & Joseph have to go to pay taxes? Where did Mary lay baby Jesus after He was born?
Song to be Sung or Listened to: Away in a Manger

Notice that baby Jesus is not in the manger

Day 5: Gloria in Excelsis Deo
Angels visit the Shepherds
Luke 2:18-24

Nativity Figures Needed: The Angel & Shepherds
Discussion: Why did the angels appear to the shepherds? Discuss how Jesus is the Lamb of God.
Song to be Sung or Listened to: Angels We Have Heard on High

Day 6: Shepherds
Shepherds visit the Christ child
Luke 2:15-20

Nativity Figures Needed: Joseph, Mary, Jesus, Shepherds & stable animals
Discussion: How did the shepherds find baby Jesus? Who did the shepherds tell about Jesus?
Song to be Sung or Listened to: O Come All Ye Faithful
Baby Jesus in the manger

Day 7: Magi
3 Kings visit the Christ child
Matthew 2:1-12

Nativity Figures Needed: Joseph, Mary, Jesus, 3 Kings & stable animals
Discussion: What made the star they saw different than the others? What type of gift would you give Jesus for His birthday? Discuss ways you could give Jesus a birthday gift by volunteering, serving or donating.
Song to be Sung or Listened to: We Three Kings

I also created a printable to go along with each day. Print, laminate and cut out cards to place by the Nativity figures each day. You could also hide the cards in your tree for the kids to find. Or keep the printable as a whole document to reference each day.


FTC Disclosure: All personal opinions and/or views regarding Melissa & Doug are my own and may differ from other users of Melissa & Doug products. I'll be compensated by Melissa & Doug for this post.

There are SO many different ways (from simple to elaborate) to celebrate the Christmas story with your children. My plan is to focus on the Nativity as much as possible when they are young so that as they grow, they realize that Christmas isn't about gifts, or toys, or a Santa, or Christmas trees. It's about a King who was born of a virgin mother, suffered, died and rose again to save us.

The linky below is filled with beautiful ideas for activities, books, crafts that celebrate the Nativity. Please take a moment to visit a few other links and don't forget to link up YOUR Nativity activities!

Here is a list of the 28 fabulous bloggers participating in the Focus on the Nativity Blog Hop today!

Christmas Around the World: Brazil


I'm so glad you're joining us as we start our journey, celebrating Christmas Around the World! If you missed Living Life Intentionally's introduction post, you can pop on over now (she's got some spectacular printables to go alongside our series!). 

I'm delighted to begin the series with Brazil. We chose Brazil because it's always intrigued me and honestly, because Brazil loves soccer. We've never been to Brazil, but the Farmer does have a Brazil beanie from a player who visited Brazil and brought him a souvenir. 

When I started this journey, I couldn't find much about Christmas in Brazil so I dug deeper and deeper until I found some pretty awesome stuff that I'm delighted to share with you! 

Traditions

Each year Rio de Janeiro celebrates the lighting of the Lagoa Christmas tree, a floating Christmas tree that stands 279 ft tall. The celebration includes fireworks, ballet performances and a symphonic orchestra (this may vary from year to year). Sweet P and I found a few videos online and watched the lighting of this amazing Christmas tree!

How awesome would that be LIVE?!

Recipe

When I first started looking for recipes, I thought I'd make a Brazilian meal, but then I found these Brazilian cookies and was sold. 

I had everything I needed in the house and we set to work on Saturday morning. I'll just fill you in on what occurred. While watching the first batch spin in the mixer, I saw something black. I stopped the mixer, scooped it out and scrutinized it. Yep. A black beetle. Tiny. Disgusting. Totally in the corn starch. 


So I dumped out the first batch into the garbage and started over with a fresh box of corn starch (luckily I had that too). By that time Sweet P lost interest and went off to play as I finished the dough. It sat for the required 20 minutes and then I rolled the cookies into balls, giving Sweet P the job of flattening them with a fork (an unnecessary step if you ask me). 

I really wanted to love these cookies. But. I didn't. Sweet P did (because that kid loves anything with sugar), but I was not impressed. Maybe it's because corn starch reminds me of Goop and nails on a chalk board, I don't know. I do love that they are gluten-free and Brazilian, but they didn't win me over. 

{What you need}
2 cups corn starch
1 cup sugar
3/4 c butter (at room temp)
1 tsp vanilla (the recipe called for real vanilla, but I only had imitation)
1 egg

Preheat oven to 375 degrees. Combine all ingredients on low in a mixer. Scrape down sides with a spatula until all is combined. Set aside for 15 to 20 minutes. Roll into balls and place on greased cookie sheet. Bake 7-10 mins until edges are a bit browned (not much!). 

*Cookies will be EXTREMELY crumbly while hot, wait until they've cooled to remove them from the cookie sheet. Store in an airtight container. 

Brazilian Flag Ornament

When I was looking through Brazilian Christmas ideas, I came across several ornaments with the Brazilian flag and thought that would be a great learning tool for Sweet P. 

I cut out the pieces for her and showed her a picture of the flag online. She assembled the ornament and stuck on the star pieces (rhinestones) while we talked about what ORDEM E PROGRESSO meant. She kept saying "Order and Progress, Order and Progress!"

{What you need}
blue, yellow and green cardstock
stickable rhinestones, a white crayon, silver star stickers, etc.
embroidery floss or string for hanging

Cut out the shapes of the Brazilian flag in the appropriate colors, with the exception of green. Cut a large circle for the green. Assemble flag on green circle. Write ORDEM E PROGRESSO with a black sharpie on the white portion of the flag. Stick on rhinestones, stars or color with a white crayon where the stars should be. 

Punch a hole in the top of the circle, thread string or floss and hang! 

Each star represents a certain state, but our ornament has a few less due to the size of the rhinestones. 

Nativity

A common tradition in Brazil during Christmas involves creating or setting up a Nativity scene. A variety of Nativity sets and scenes can be found throughout Rio de Janeiro during the month of December. Many are made from recycled materials, including this one made from the bottom of plastic pop bottles! 
Picture 19

In Brazil, the Nativity is also called Presepio, from the word "presepium," which refers to the bed of straw Jesus slept on when He was born. I loved the idea of creating a bed of straw, so I set up an invitation to play for Sweet P with a manger, yarn straw and glue for her to find when she woke up in the morning. 


I also had pieces of a Nativity set out for her (they were stickers she put on paper last year and I just cut around them so they were flat playing pieces) and made a tiny baby Jesus out of a wooden bead, some pompoms and scrap fabric. While she was playing with and arranging the Nativity pieces she asked, "Where's Jesus?" I pointed to the baby and said, "He's right here. This is when He was a baby." And in true 3 year old fashion she asked, "Why?"

As she made the manger, we talked about what "presepium" means and when I asked her later she said, "A bed made of yarn." Which in her manger's case was correct! 

How amazing is it that our Savior, our KING, slept on a bed of straw? This was by far MY favorite part of our Brazilian Christmas study: making the manger and talking about our King.

I wasn't sure Sweet P understood what we were doing, then on Saturday night (movie night), she told me "I'm going downstairs to see if we have a Brazilian Christmas movie!" Ha. So something was working around in that sweet little head of hers!

I hope you enjoyed learning about Christmas in Brazil as much as we did! Be sure to check out tomorrow's post by Sun Scholars on Christmas in China

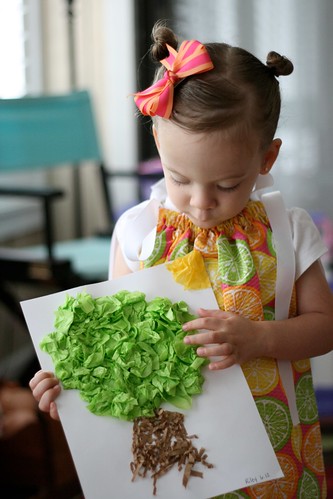
Coffee Filter Fall Trees


We've been working on Letter T for 2 weeks since there are SO many awesome activities to do with trees! A few weeks ago we went to a playdate at a friend's house and did a coffee filter Earth project. Sweet P loved using the dropper with the dye to create so I thought she'd enjoy making trees.

Ummm, let's just say we've got 12 fall trees hanging up around the house! I'd say she enjoyed it! Each time I asked, "Are you done or do you want to do more?" She'd say, "Do more!" So we did it until she was done.

I laid them out on cookie sheets with the windows open and they dried in about 30 minutes. When they were dry Sweet P rubbed glue on the trunks and created a forest of trees. We put them up on the windows because I LOVE the way they look with the light behind them! I also love the abstract nature of the trees. Can you tell I think they're stinkin' adorable? I'm thinking of turning a few into a canvas to hang year round.

By the way, don't look out the window. Then you'll see that it doesn't quite look like fall and we've still got green leaves attached to trees. Oh well! It may not look like fall outside, but it does inside!


Here's what we used:
coffee filters
water mixed with red, yellow and orange food coloring
medicine dropper
brown construction paper
glue stick

Super simple and you probably have everything you need at home!

Like the Iowa Farmer's Wife on Facebook for updates and new posts!
You can also follow The Iowa Farmer's Wife on TwitterPinterest and Google+

Bath Time Foam Faces

As I said in my Making Faces Magnets post, Sweet P is a bit obsessed with making faces.

So one day while the kids were napping at the same time (my mind goes a bit bonkers on those days), I got to work on some foam facial features I thought she'd love for bath time. NOTE: Craft foam will pretty much stick to anything once you get it wet - it does fall off when it drys.

I set them up and closed the curtain so she wouldn't see them until bath time. Well, I ended up making mustaches after I closed the curtain and forgot to close it the 2nd time so when she came down after nap, into the tub she went!

She was SUPER excited about these (told you the kid loves making faces!) and has played with them over and over and over again. We even got them to stick to our front window so she could use them there.

What you need:
  • various pieces of foam
  • scissors
  • glue gun
I just free-handed the parts and glued some of the eye pieces together to give them depth, but you could just cut out white circle and draw pupils with a felt-tipped pen. 
Simple, cheap AND provide HOURS of fun! Can't beat an activity like that. Makes it hard to get her out of the tub!

I showed her how to get them wet so they'd stick to the side of the tub, then sat back to watch her create.

The faces she made were so hilarious, we couldn't stop laughing, especially when she'd put a mustache on top of a nose. Sprout was in bed the first night we used them, but he got a kick out of watching her put together faces, too!

Around the 3rd time she played with them, she added some Boon Bath Goods and created "octopuses." I love how her little mind works!


Like the Iowa Farmer's Wife on Facebook to receive updates and see other posts! You can also follow The Iowa Farmer's Wife on TwitterPinterest and Google+


The Grouchy Ladybug Activities

I love the humility lesson in The Grouchy Ladybug along with the friendliness of the friendly ladybug despite the attitude of the grouchy ladybug. 

As we read through the book this week, we mimicked some of the other animals the ladybug came across. Here are the few of the actions we did:
  • showed our stinger like the yellow jacket
  • used our hands as horns like the stag beetle
  • prayed like a praying mantis
  • opened our mouths like the sparrow
  • stretched our claws like the lobster
  • lifted our tail like the skunk
  • hissed like a snake
  • laughed like a hyena
  • beat our chests like a gorilla
  • lowered our noses like a rhino
  • raised our trunk like an elephant
  • said THANK YOU! like the grouchy ladybug

Grouchy Ladybug - Friendly Ladybug - Leaf w/ Aphids Craft
I like to think that at the end of the book the Grouchy Ladybug becomes friends with the Friendly Ladybug. They also help the leaf by eating all the aphids. Saying thank you when a friend shares and thank you when someone helps us shows appreciation to our friends or acquaintances.

To show the end of the book relationship, Sweet P created 2 ladybugs and a leaf w/ aphids on it. The Grouchy Ladybug had a down-turned mouth and frowny eyebrows to show the difference between the two ladybugs.
She chose pink for the Friendly Ladybug and red for the Grouchy Ladybug. Because she wanted to paint with green and yellow, she used both on the leaf.

I set the plates outside to dry while Sweet P played for a bit. When I brought them back in she glued on eyes, mouth and eyebrows. I was going to have her poke through the plate with a pushpin to make a hole for the antennae, but the plate was wonky and she had a hard time so I did it.
Using a circle cutter with a grip, she cut out 10 black circles for ladybug spots. We used a sunburst hole punch for the aphids, but it was too hard for her to push. I even had a hard time! I punched out 10 aphids for the leaf.

To finish, Sweet P glued the spots on the ladybugs and counted the 10 aphids before gluing them to the leaf.

I set them together to take a quick photo and she rearranged them so that the ladybug mouths were touching the leaf so they could eat!


Here's what Baby Blue was up to while Sweet P glued!


Like the Iowa Farmer's Wife on Facebook to receive updates and see other posts! You can also follow The Iowa Farmer's Wife on Twitter, Pinterest and Google+

Musical Play: DIY Drums

One morning before my munchkins got up, I set up a drum set. Not your average drum set, but a drum set nonetheless. I grabbed some wooden spoons drum sticks and laid it out for them.

Baby Blue was up first, but wasn't yet crawling so he wasn't sure what to do until big sister came down and showed him the ropes.

She banged and bongo'ed and beat those drums until I said, "Want some breakfast?"


This activity allowed her to hear how different items make a different sound when you hit them. The large cauldron was by far the loudest and actually made Baby Blue cry a few times. It made a sharp, ear piercing ting when hit with the sticks.

I showed her how to move the pizza pan around to hear the different sounds it made when resting on something different. It really did sound like a cymbal!

The next day she played the drums and then started cooking!

Baby Blue loved it too, but he usually ended up eating the drum sticks after he banged a few times (drumming must work up an appetite).

These stayed out for several days until I needed one of the spoons and a pot for dinner one night! Who needs a drum set when you have pots, pans and plastic containers?

Our drums:

  • stainless steel large pot
  • large sauce pan
  • plastic ice cream bucket
  • cardboard box
  • small trash can 
  • foil pan
  • plastic tub 
  • pizza pan

Readathon 2012: 5 Little Ducklings


It's Week 1 of the MeMeTales Readathon and this week's theme is ANIMALS! If you haven't signed up, you still can. Read more in this post to find out how.

We LOVE the MeMeTales 5 Little Ducklings ebook. In fact, I think I like it more than Sweet P does!

If you're not familiar with The 5 Little Ducklings, it's an old rhyme that is often sung so I can't help but sing the words! I like to read the ebooks as well as listen to them - so this one gets sung (even the Farmer gets it stuck in his head) instead of read.

I knew I wanted to use felt (surprise, surprise!) to create the ducks and quickly whipped up some yellow ducks and a mama late one night. I used Sharpie for their eyes and a little orange piece of felt for the beak. I hot glued them together and wa-la! Instant ducklings.
Sweet P loved putting them on and singing along, but also liked playing with them flat on our bookshelf. We did the activity a few different ways:
  • Mama duck on my finger, baby ducks on the bookshelf: she pulled one off and scooted them back and forth as we sang
  • Mama duck on my finger, baby ducks on her hand: she flicked one off each time the mama called them back
  • Mama and baby ducks on the bookshelf: she dropped the baby ducks on the floor as we sang
Sweet P wanted a grilled cheese for lunch so I made a mama duck with her 5 little babies! As she ate she'd say "There's only 4 now!" and we made up silly rhymes like "4 little duckies sitting looking so yummy! I ate one and now it's in my tummy!" 
Mama duck: grilled cheese with carrot hair and beak, grape/raisin eyes
Baby ducks: Banana with raisin eyes and carrot hair and beak
Cloud/sun: Greek yogurt and carrot
Water: blueberries

We've been having a great time with the Readathon! How about you?

Find other fun activities from other bloggers by visiting the MeMeTales Blog!

Outside Play Link-Up: Chalk Dress-Up Dolls

I'm excited to be hosting June's Outside Play link-up created by JDaniel4sMom with several other fabulous bloggers. We love sidewalk chalk at our house. In fact, it's a staple in the outdoor toys and makes an appearance most days. Sweet P's favorite activity at the moment is her Sidewalk Chalk Road and Town, but two nights ago it washed away by a thunderstorm. Since I knew this post was coming up, I decided we'd try something else instead of drawing another road. 


Sweet P love, love, loves dressing things. Stuffed animals, babies, sticker dolls, tiny dolls. If it's dressable, she's all over it. She loves picking out Baby Blue's clothes (she doesn't dress him...yet!) and has recently begun picking out her own clothes (interestingly enough she didn't much care about what she wore until lately). Laying clothes out on the floor in the shape of a person is another favorite pastime of hers (especially when we are doing laundry!). So I took these ideas, paired them with chalk and came up with Chalk Dress-Up Dolls!
Sweet P laid on the sidewalk (with the sun in her eyes, poor thing) while I traced her body. She thought this was pretty cool and wanted me to trace myself, but settled for another body that I free-handed closer to her size (so she could dress two). I also traced Baby Jim (her beloved boy baby doll) so that he could participate. She gave herself a face and hair, while I decorated myself. Her commentary was too cute. 

Sweet P: Did you give yourself yellow hair?
Me: Yep. We don't have brown chalk. It looks like yours!
I brought out a bag of clothes for her to use that included: 2 dresses, a leotard, 3 pairs of shorts, several tops and 2 pairs of shoes. Sweet P was WAY excited when she saw that she could dress the girls. 

Sweet P: Did you bring out your clothes too?
Me: No, but I think my girl can share your clothes. 

She was skeptical and got pretty excited when one of the dresses fit "my" body. Do you think she'll start thinking we can share clothes?! Uh-oh. 
She's drawing my shoes in the bottom right picture and drawing her face in the top right.

She changed herself several times (I only got to wear the dress) and put Baby Jim in his bathing suit (it's a bathing suit for a Build-A-Bear and it's missing the bikini top, so yes, it looks like a Speedo). 

The Farmer got in on the action and asked me to trace him. His outline ended up looking a lot like a boxer and it was pretty hilarious. 

For clean-up, I simply tossed the chalky clothes in with a load of laundry I was already doing. Simple and cheap! If you have sidewalk chalk, you're ready to play!


It's your turn to link-up your Outside Play: Chalk ideas! Please try to visit, comment on, pin, tweet and share a few other posts. Please place the button in your post or somewhere on your blog and be sure to visit each of the co-hosts to see their chalk ideas! Check back in July for more Outside Play ideas!

Photobucket

Co-hosts for June's Outside Play: Chalk

{Weekly Kid's Co-op #7} Linky & Features

Welcome back to another week of the Weekly Kid's Co-op! Last week was CRAZY for this little family so I didn't post, so this week we'll have 5 features instead of 3!
The Weekly Kid's Co-op
It was a great week of posts! If you missed it, check out last week's Co-op here! So without further ado here are this week's features:

Love this sea life playmat from Making Boys Men! There are SO many different ways to use it and so many other scenes you could create!

Doesn't this Color Mixing and Oobleck activity from Train Up a Child look like tons of fun! We just played with oobleck for the first time last week and I love the color mixing aspect of this post!


How fun is this recycled calendar matching game from Pre-school Play?! What a great way to show real life animals in their habitats! 


Ok, how cool is this?! It's a seed matching game from Stories and Children! Such a fun way to teach kiddos about what comes from these seeds and how they are different. We have SO many seeds and beans so we are definitely doing this!
Seed Matching Game

A Day in the Life of the Brown Family shared this adorable post about plants and the art they created! I love all their art projects, especially the tree! Plus, the photography is awesome!
IMG_2217

Were you featured today? Don't forget to grab a feature button!


TheIowaFarmersWife